HOW-TO GUIDE
How to Tell If Multimeter Test Leads Are Bad
By the OhmSavvy Research Team ·

Symptoms and causes
Bad leads rarely announce themselves. More often they look like a different problem: a meter that seems faulty, a circuit that seems dead, or a resistor that seems out of tolerance. If you see any symptom in the left column, test the leads before you suspect anything else.
| Symptom | Likely cause | How to check | Fix |
|---|---|---|---|
| OL with probes pressed together | Open conductor, plug not seated, or wrong dial position | Reseat plugs, confirm ohms range, test each lead alone | Replace the open lead |
| Reading jumps when the cable moves | Broken strands near the plug or probe | Flex test while watching the ohms reading | Replace the leads |
| Probes-together reading above about 1 Ω | Corroded plugs, dirty tips, or partly broken conductor | Clean plugs and tips, then retest | Replace if it stays high |
| Low or zero volts on a known live outlet | Intermittent lead, or a blown fuse if on a current jack | Prove on a known source; check the leads are in COM and V | Replace the leads; move the red lead to the V jack |
| Plug wobbles in the jack | Worn plug springs or a worn jack | Try a known-good lead in the same jack | Replace the leads, or have the meter checked |
| Cracked, cut or melted insulation | Age, heat, crushing or a slip with a knife | Look along the full length in good light | Replace the leads; never tape them |
| Bent, blunt or loose probe tip | Wear, prying with the probe, or a drop | Inspect the tip and its fixing | Replace the leads, or the tip if it is designed to be swapped |
The five checks always run in the same order, cheapest and quickest first:
01
Short
Probes together on Ω
02
Isolate
Each lead end to end
03
Flex
Watch for jumps
04
Inspect
Insulation, plugs, tips
1Short the probes on ohms
Plug black into COM and red into the VΩ jack, pushing each plug fully home. Select the lowest resistance range (on a manual-ranging meter, usually 200 Ω) rather than continuity. Press the tips firmly together, metal to metal. What you see is the combined resistance of both leads, both plugs and the meter's internal contacts. On a healthy set that is typically a few tenths of an ohm, and it should settle within a second or two. The exact figure depends on the lead length, wire gauge and meter, so the most useful reference is your own leads when they were new; note the figure down once and you will spot a change straight away.
| Probes-together reading (typical) | Verdict | What to do |
|---|---|---|
| About 0.1–0.5 Ω, steady | Good | Use REL or Δ to subtract it on low-ohm work |
| About 0.5–1 Ω, steady | Borderline | Clean plugs and tips, retest, compare with a known-good set |
| Above about 1 Ω, steady | Suspect | Test each lead alone to find which one is high |
| Drifts or jumps | Faulty contact | Flex test; replace if movement changes the reading |
| OL | Open circuit | Check the dial and plugs, then test each lead alone |
If the display reads OL, first rule out the obvious: the dial on volts instead of ohms, or a plug sitting in the wrong jack. If the meter is blank rather than showing OL, the leads are not the cause; see why a multimeter won't turn on. And for the meaning of OL across other ranges, read what OL means on a multimeter.
2Test each lead end to end
The probes-together test tells you the pair has a problem but not which lead. To isolate one, you need a second, known-good set. Plug the good leads into the meter, short them and press REL or Δ if your meter has it, so the display starts from zero. Now lay the suspect lead on the bench, touch one good probe to the metal of its banana plug and the other to its probe tip. You are now measuring that one lead alone. A short lead in good condition typically adds only a tenth of an ohm or so; one that reads much higher than its partner, or OL, is the faulty one. No spare set? Swap the leads one at a time with any lead you trust: whichever swap cures the fault identifies the bad lead.
While a lead is isolated like this, also check the jack it lives in. Plug the good lead into the jack the suspect lead came from and repeat the probes-together test. If the high reading follows the old lead, the lead is at fault. If it stays with the jack, the meter's socket is worn or dirty, and replacing the leads will not help. A worn input jack on a meter you use for mains work is a job for the maker's service center, not a home repair.
3Do the flex test
This step finds the fault that every other check misses. Keep the lead connected as in step 2, or keep the probes shorted as in step 1, and slowly bend the cable back and forth where it enters the banana plug, then where it enters the probe body, then along its length. Watch the display, not the lead. Copper strands fatigue and break inside the insulation at those strain points, and a lead with only a few strands left can read perfectly when lying straight and open the moment it bends. Any flicker, jump or flash of OL while you flex means a broken conductor. That lead is finished; trimming and re-terminating it removes the factory-molded strain relief and plug that carried its safety rating. The same method works on any cable, as our guide to finding a broken wire with a multimeter explains for longer runs. If your continuity beeper chatters while you probe, that can be a lead too; see intermittent continuity beeps.
4Inspect insulation, plugs and tips
Run the leads through your fingers in good light. Look for cuts, nicks, crushed spots, shiny melted patches from a soldering iron, and stiff or cracked insulation on old PVC leads. Some leads have a contrasting colored inner layer that shows through when the outer jacket wears; if you can see it, the lead is due for replacement. Next, the plugs: a shrouded banana plug should push into the jack with some resistance and not wobble or fall out under its own weight. Dull, oxidized plugs can be cleaned with isopropyl alcohol, but a loose fit means the spring contacts are worn. Try a known-good plug in the same jack to tell a worn plug from a worn jack. Finally, the tips: a bent, blunt or loose tip makes poor contact and can slip on live terminals. Many leads come with snap-on tip caps that limit the exposed metal; keep them on for panel work, where a long bare tip can bridge two terminals.
Damaged leads have no place on mains
5Replace with the right CAT rating
A meter and its leads are a system, and the system is only as safe as its lowest rating. Replacement leads should carry a CAT rating and voltage at least equal to your meter's, and to the work you actually do. Fitting CAT II leads to a CAT III meter turns the whole setup into a CAT II tool. Fitting leads rated higher than the meter does not raise the meter's rating, but it costs nothing in safety. Look for the rating printed or molded on the lead and the probe body, not just on the packaging. Silicone insulation stays flexible in the cold and resists soldering-iron burns better than PVC, which makes it the comfortable choice for bench use.
| Category | Typical location | Lead rating to look for |
|---|---|---|
| CAT II | Plug-in appliances and wall outlets | CAT II or higher, at the meter's voltage |
| CAT III | Service panels, fixed wiring, hardwired equipment | CAT III or higher, at the meter's voltage |
| CAT IV | Service entrance, meter base, outdoor feeds | CAT IV leads on a CAT IV meter |
How much a bad lead skews readings
Lead resistance adds directly to every resistance you measure, so its effect depends on what you are measuring. The arithmetic is simple: error equals lead resistance divided by the true value. With a good 0.3 Ω pair, a 10 Ω part reads 10.3 Ω, an error of 3%. With a damaged pair at 1.5 Ω, the same part reads 11.5 Ω, a 15% error that could make a good heating element or speaker coil look faulty. On a 1 kΩ resistor those same leads cause errors of only 0.03% and 0.15%, which is why worn leads go unnoticed on everyday work and then cause confusion the first time you measure something small.
The REL or Δ button subtracts a steady lead resistance, but it cannot correct a broken conductor whose resistance changes as you move, so null only leads that have passed the flex test. If your leads pass every check and readings still wander, the cause lies elsewhere; our guides to unstable multimeter readings and a multimeter showing the wrong voltage cover the next suspects. New to the meter itself? Start with how to use a multimeter and the multimeter symbols guide.
Short, isolate, flex, inspect
Meters to pair with properly rated leads
CAT III 600V, True RMS and built-in NCV, made for daily field use.
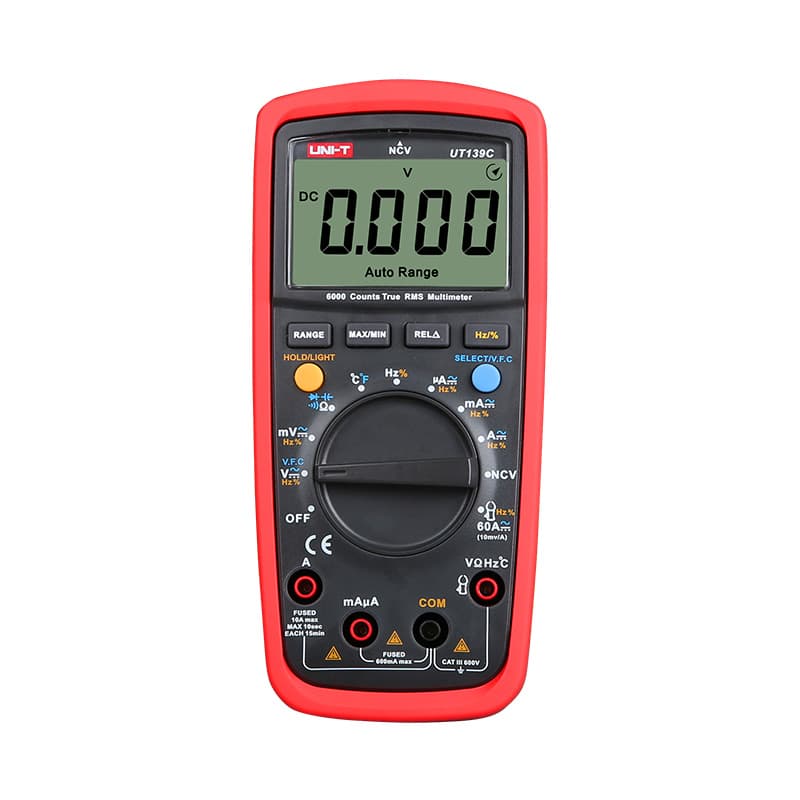
CAT III 600V True RMS meter with a 6,000-count display at a budget price.

CAT II 600V auto-ranging meter for home use, not service-panel work.
As an Amazon Associate I earn from qualifying purchases. Prices and availability are shown on Amazon.
Frequently asked questions
What should my multimeter read when I touch the leads together?
On the lowest ohms range, a good pair of leads typically reads somewhere around 0.1 to 0.5 Ω, and the figure should settle quickly and stay put. That small value is the resistance of the leads, the plugs and the meter's own contacts. A steady reading above roughly 1 Ω, a value that keeps drifting, or OL points at the leads or the jacks.
Can bad test leads give wrong voltage readings?
Yes. A lead with a broken conductor can make an intermittent connection, so the meter shows zero, a low figure or a number that jumps around on a circuit that is really live. That is dangerous, because a broken lead can make live wiring look dead. Always prove the meter and leads on a known live source before and after testing a circuit you believe is off.
Can I repair a cut in my multimeter lead with electrical tape?
No. Tape does not restore the insulation rating the leads were certified to, and it can slide or peel off in use. Leads are a low-cost part compared with the risk of a shock or an arc flash at mains voltage. If the outer insulation is cut, cracked or melted, or a contrasting inner layer is showing through, retire the leads and buy a properly rated set.
Why does my continuity tester beep with bad leads?
Continuity mode only checks whether resistance is below a threshold, and on many meters that threshold is in the tens of ohms. A lead that has lost most of its strands may add a few ohms and still beep perfectly. Use the ohms range instead, which shows the actual figure, so you can see that a pair reading 4 Ω instead of 0.3 Ω has a problem.
Do I need test leads from the same brand as my meter?
No. Banana plugs on handheld meters follow a common 4 mm format, so most third-party leads fit. What matters is the rating: the leads should carry a CAT rating and voltage equal to or higher than your meter's and the work you do, from a maker that marks the rating on the lead itself. Check that the shrouded plugs seat fully in your meter's jacks.
How often should multimeter test leads be replaced?
There is no fixed interval; replace them on condition. Check them every time you pick up the meter for mains work: a quick probes-together reading and a look along the insulation take seconds. Replace them whenever the insulation is damaged, the reading wanders when you flex the cable, the plugs fit loosely, or the tips are bent or worn down. Heavy daily use wears leads out sooner.


